![]()
Angular Containerized Development using Docker with Dev Containers within Visual Studio Code
What
Angular containerized development environment with Docker and Visual Studio Code
When
Rapid development is becoming the de-facto standard for a dynamic development environment. Traditional build setups, that involves dependencies on the hosting environment poses a great challenges for developers.
Why
The following reasons explains the possible conditions that a containerized development setup for angular using docker and visual studio code is worth to consider.
- Consistency, all development machines can use the same setup and configurations without worrying of hosting machines.
- Easy pull the repository and all the development dependencies are available. Easy for neophyte developers to build a containerized development environment.
- The host machines are non-polluted with dependency nightmares
- The docker development machine is containerized, obvious benefits outweighs traditional development build setup.
How
Prerequisites
- Visual Studio Code
- Docker
- ‘Remote Containers’ extension for Visual Studio Code
Getting started
Setup Visual Studio Code and Remote Containers
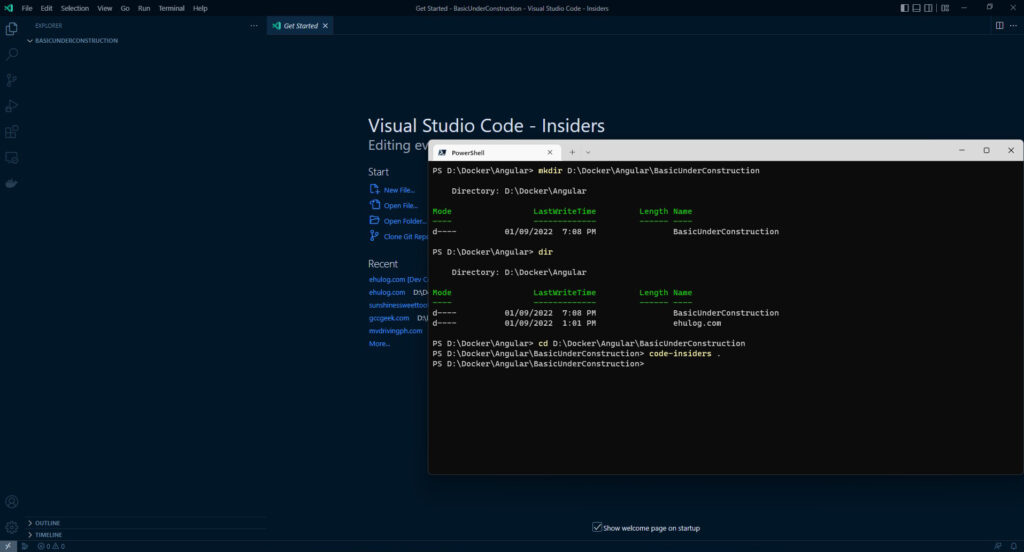
Create a folder, use your drive preference
PS> mkdir D:\Docker\Angular\BasicUnderConstruction
PS> cd D:\Docker\Angular\BasicUnderConstruction
Use visual studio code, I’m using code-insiders version
PS> code-insiders . or
PS> code .
Development Container
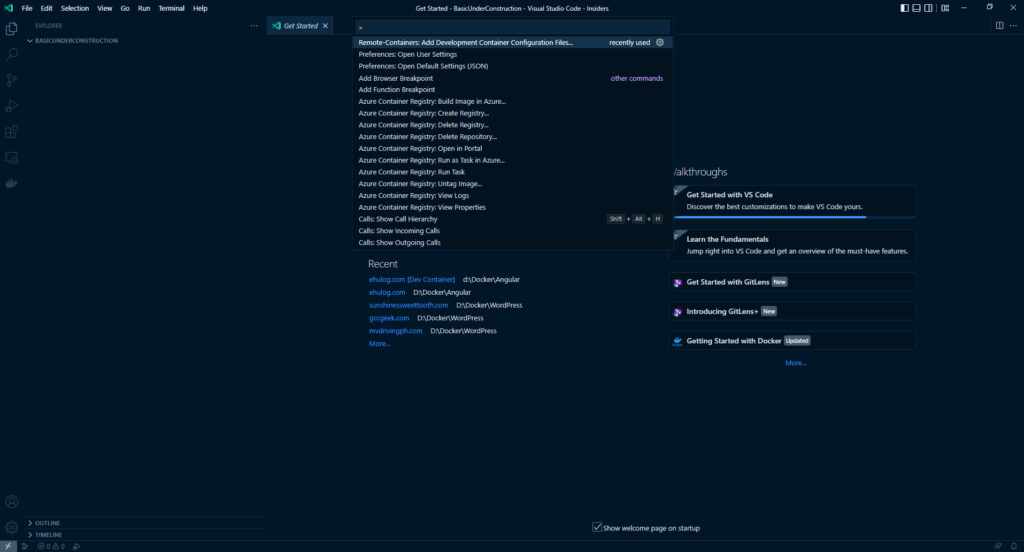
In visual studio code, press F1 function key. Search and add for Add Development Container Configuration Files. Note: Remote Container plugin must be installed, as per prerequisite.
Now Search for Node.js & TypeScript
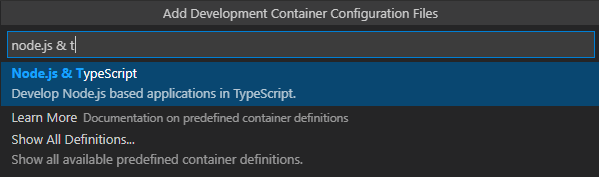
Select node version 16

There’s no need for any additional features, select OK

Visual studio popup action will appear, Reopen in Container
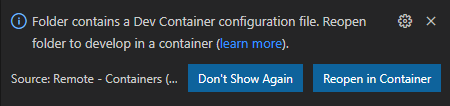
Note: If the popup doesn’t show up, hit F1 and search for Remote Containers: Rebuild Container
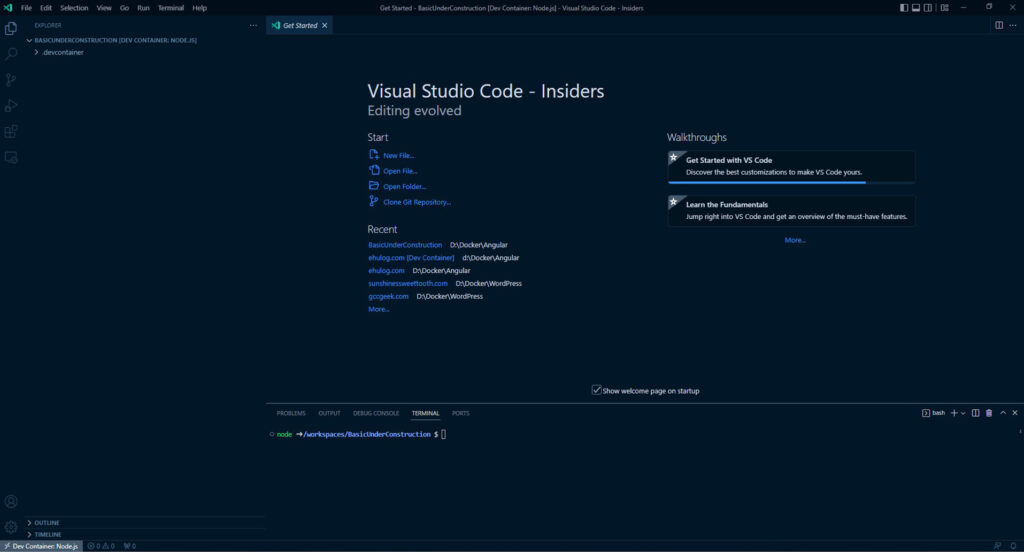
Reopen in Container can take a while for the first time, subsequent reopens can make load times faster. Once done, the bottom-left corner of Visual Studio Code should look like:

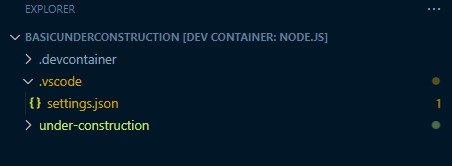
No obvious difference is noticeable visually other than the Explorer will have .devcontainer and the title will have (DEV CONTAINER: NODE.JS)
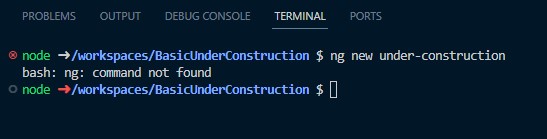
To verify that our remote container is working, open a Terminal, you will have a node prompt that is either Windows or WSL
The docker container remote environment is ready but Angular is not installed nor prepared to handle project development.
Install Angular
Open up the Dockerfile in the .devcontainer folder
Uncomment the line to install global node packages, and add the angular cli.
You can check the latest version at: https://www.npmjs.com/package/@angular/cli?activeTab=versions
# [Choice] Node.js version (use -bullseye variants on local arm64/Apple Silicon): 18, 16, 14, 18-bullseye, 16-bullseye, 14-bullseye, 18-buster, 16-buster, 14-buster
ARG VARIANT=16-bullseye
FROM mcr.microsoft.com/vscode/devcontainers/javascript-node:0-${VARIANT}

# [Optional] Uncomment this section to install additional OS packages.
# RUN apt-get update && export DEBIAN_FRONTEND=noninteractive \
#     && apt-get -y install --no-install-recommends <your-package-list-here>

# [Optional] Uncomment if you want to install an additional version of node using nvm
# ARG EXTRA_NODE_VERSION=10
# RUN su node -c "source /usr/local/share/nvm/nvm.sh && nvm install ${EXTRA_NODE_VERSION}"

# [Optional] Uncomment if you want to install more global node modules
RUN su node -c "npm install -g @angular/[email protected]"
RUN su node -c "npm install -g node-sass"
RUN su node -c "npm install -g sass-loader"
RUN su node -c "npm install -g raw-loader"
Without the version, you will get the latest. For consistency, version can be specified, as seen from the Dockerfile above.
Press F1, Remote Containers: Rebuild Container (Rebuild and Reopen Container, if fully disengaged from remote) to affect changes to the remote container environment.
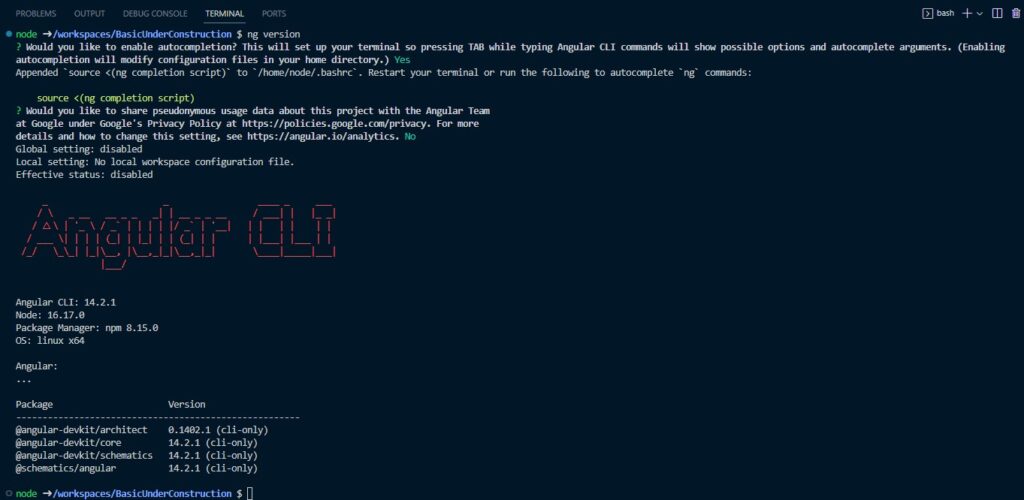
On the terminal, check if angular is working, issue a ng version command. On successful cli installation, the following will be displayed.
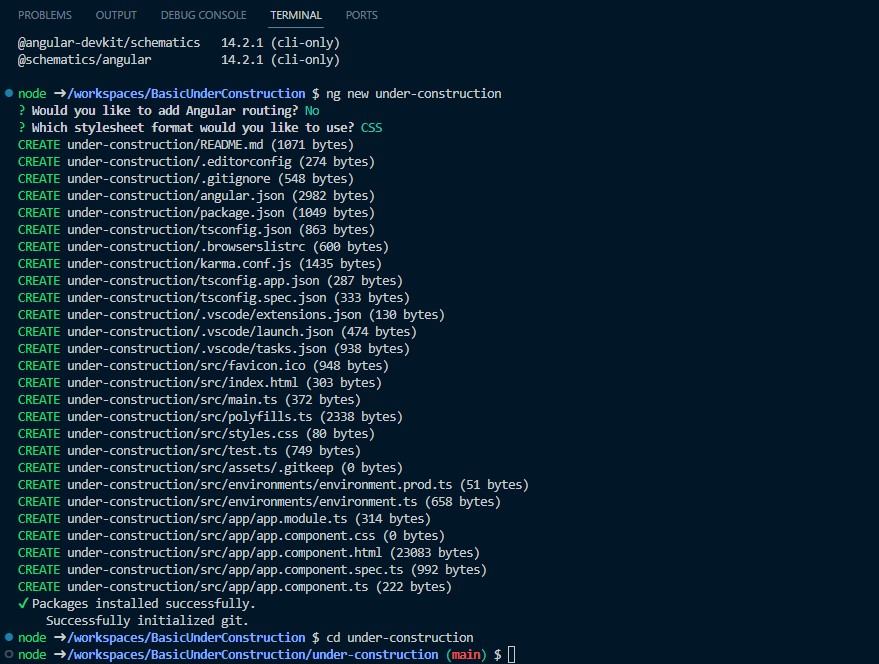
Create an Angular application
On the terminal:
ng new under-construction(Select defaults, press Enter. Packages and scaffolding will be created by npm and angular)cd under-construction
ng buildng serve #OR ng serve --poll=2000(application should now be running in http://localhost:4200, open in your preferred browser.The poll helps in reloading, if changes occurs in files)
Extensions
Development container’s major advantage against traditional setup is the capability to configure Visual Studio Code IDE with specific extensions for the project.
Add the following extensions to the devcontainer.json
// Configure tool-specific properties.
"customizations": {
	// Configure properties specific to VS Code.
	"vscode": {
		// Add the IDs of extensions you want installed when the container is created.
		"extensions": [
			"dbaeumer.vscode-eslint",
			"lucono.karma-test-explorer",
			"angular.ng-template",
			"johnpapa.angular2",
			"alexiv.vscode-angular2-files",
			"esbenp.prettier-vscode",
			"dbaeumer.vscode-eslint",
			"shardulm94.trailing-spaces"
		]
	}
},
Press F1, Remote Containers: Rebuild Container to affect changes to the remote container environment.
Feel free to add additional extensions, as the project needs arises. Above are the common extensions to get you started.
Testing
Before this can be classed as a ‘dev environment’, we need to be able to run unit tests.
On the terminal, if the application is running, issue Ctrl + C. Then run the angular test
ng test(on the project application directory, [under-construction directory from the example above], not the root folder)
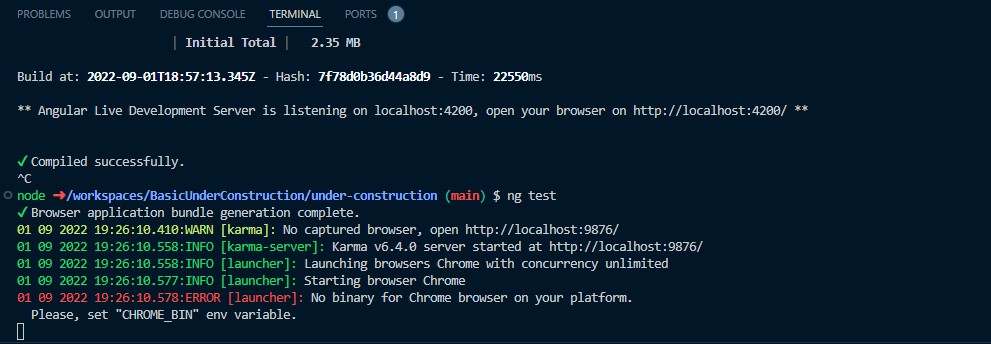
Docker does not have a browser installed. The browser helps in running the build so that it can be tested. The Dockerfile must be updated.
# [Choice] Node.js version (use -bullseye variants on local arm64/Apple Silicon): 18, 16, 14, 18-bullseye, 16-bullseye, 14-bullseye, 18-buster, 16-buster, 14-buster
ARG VARIANT=16-bullseye
FROM mcr.microsoft.com/vscode/devcontainers/javascript-node:0-${VARIANT}

# [Optional] Uncomment this section to install additional OS packages.
# RUN apt-get update && export DEBIAN_FRONTEND=noninteractive \
#     && apt-get -y install --no-install-recommends <your-package-list-here>

# [Optional] Uncomment if you want to install an additional version of node using nvm
# ARG EXTRA_NODE_VERSION=10
# RUN su node -c "source /usr/local/share/nvm/nvm.sh && nvm install ${EXTRA_NODE_VERSION}"

# [Optional] Uncomment if you want to install more global node modules
RUN su node -c "npm install -g @angular/[email protected]"
RUN su node -c "npm install -g node-sass"
RUN su node -c "npm install -g sass-loader"
RUN su node -c "npm install -g raw-loader"

RUN wget -q -O - https://dl-ssl.google.com/linux/linux_signing_key.pub | apt-key add -

RUN sh -c 'echo "deb [arch=amd64] http://dl.google.com/linux/chrome/deb/ stable main" >> /etc/apt/sources.list.d/google.list'

RUN apt-get update && apt-get install -y google-chrome-stable
Karma needs to run Chrome in headless mode or we will get errors. Go into the Karma config file (karma.conf.js), and replace browsers:['Chrome'] with
// Karma configuration file, see link for more information
// https://karma-runner.github.io/1.0/config/configuration-file.html

module.exports = function (config) {
  config.set({
    basePath: '',
    frameworks: ['jasmine', '@angular-devkit/build-angular'],
    plugins: [
      require('karma-jasmine'),
      require('karma-chrome-launcher'),
      require('karma-jasmine-html-reporter'),
      require('karma-coverage'),
      require('@angular-devkit/build-angular/plugins/karma')
    ],
    client: {
      jasmine: {
        // you can add configuration options for Jasmine here
        // the possible options are listed at https://jasmine.github.io/api/edge/Configuration.html
        // for example, you can disable the random execution with `random: false`
        // or set a specific seed with `seed: 4321`
      },
      clearContext: false // leave Jasmine Spec Runner output visible in browser
    },
    jasmineHtmlReporter: {
      suppressAll: true // removes the duplicated traces
    },
    coverageReporter: {
      dir: require('path').join(__dirname, './coverage/under-construction'),
      subdir: '.',
      reporters: [
        { type: 'html' },
        { type: 'text-summary' }
      ]
    },
    reporters: ['progress', 'kjhtml'],
    port: 9876,
    colors: true,
    logLevel: config.LOG_INFO,
    autoWatch: true,
    browsers: ['ChromeHeadlessNoSandbox'],
    customLaunchers: {
      ChromeHeadlessNoSandbox: {
        base: "ChromeHeadless",
        flags: [
          "--no-sandbox",
          "--disable-setuid-sandbox"
        ]
      }
    },
    singleRun: false,
    restartOnFileChange: true
  });
};
Fully reload the folder again in Visual Studio Code by closing folder and closing remote connection.
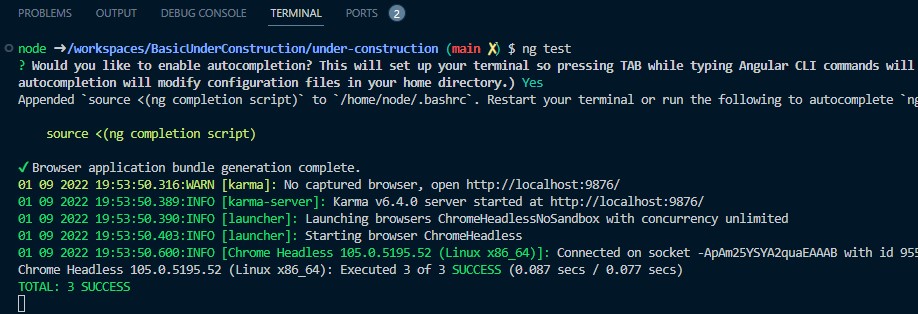
Press F1, Remote Containers: Rebuild Container (Rebuild and Reopen Container, if fully disengaged from remote) to affect changes to the remote container environment. Rerun the following in the terminal.
cd under-construction(go to the under-construction application directory)ng test(accept defaults)
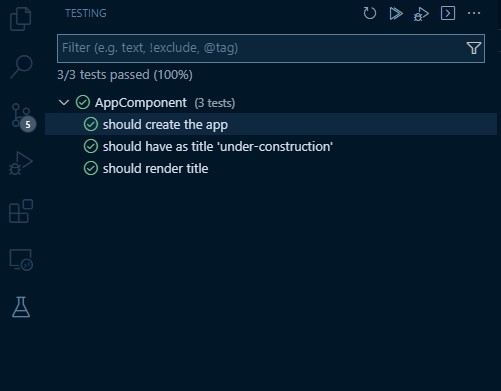
Test Explorer
Karma provides a test explorer on the left side navigation pane. This provides a more environment feel than the terminal. Configure karma by:
On the explorer, go to the root directory(root directory not the project directory, in this example BasicUnderConstruction)- right click, make a directory,
.vscode - inside
.vscode, right click and makesettings.jsonfile and paste the following:
{
  "karmaTestExplorer.projectRootPath": "under-construction",
}
Press F1, Remote Containers: Rebuild Container (Karma reloads, force reload, if needed)
Run the test with he play button on the left side testing pane
References
Angular Development in Docker with Dev Containers (https://itnext.io/angular-development-in-docker-with-dev-containers-49d2cabad445)
